mNo edit summary |
No edit summary |
||
| (27 intermediate revisions by 4 users not shown) | |||
| Line 1: | Line 1: | ||
| + | <center> |
||
| − | == '''Summary''' == |
||
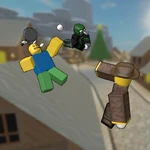
| − | '''Gamemodes''' are the core parts of gameplay within R2DA. These dictate specific instructions that the survivors must perform to win rounds, |
+ | '''Gamemodes''' are the core parts of gameplay within R2DA. These dictate specific instructions that the survivors must perform to win rounds, all the while zombies are trying to stop them. Most of these play off the typical "survivor versus zombie" with slight adjustments, but there is some "player versus player" thrown into the mix. You can vote for these by pressing tab in-game, select map, gamemode and some maps even have skybox. |
| + | </center> |
||
---- |
---- |
||
| Line 16: | Line 17: | ||
| style="padding: 5px"|[[File:RescueVersus.png|150px|link=Rescue]] |
| style="padding: 5px"|[[File:RescueVersus.png|150px|link=Rescue]] |
||
| style="padding: 5px"|[[File:Survival.png|150px|link=Survival]] |
| style="padding: 5px"|[[File:Survival.png|150px|link=Survival]] |
||
| − | | style="padding: 5px"|[[File: |
+ | | style="padding: 5px"|[[File:CampaignVersus.png|150px|link=Campaign]] |
| − | | style="padding: 5px"|[[File: |
+ | | style="padding: 5px"|[[File:CaptureTheFlag.png|150px|link=Capture the Base]] |
|- |
|- |
||
| style="padding: 5px"|Rescue |
| style="padding: 5px"|Rescue |
||
| Line 24: | Line 25: | ||
| style="padding: 5px"|Capture the Base |
| style="padding: 5px"|Capture the Base |
||
|- |
|- |
||
| − | | style="padding: 5px"|[[File: |
+ | | style="padding: 5px"|[[File:ArenaAfterBloxAwardsTemplate.png|150px|link=Arena]] |
| − | | style="padding: 5px"|[[File: |
+ | | style="padding: 5px"|[[File:Mr President.png|150px|link=The President]] |
| − | | style="padding: 5px"|[[File: |
+ | | style="padding: 5px"|[[File:RapidInfectionVersus.png|150px|link=Rapid Infection]] |
| − | | style="padding: 5px"|[[File:HardVersus.png|150px|link=Hard]] |
+ | | style="padding: 5px"|[[File:HardVersus.png|150px|link=Hard (Gamemode)]] |
|- |
|- |
||
| style="padding: 5px"|Arena |
| style="padding: 5px"|Arena |
||
| Line 34: | Line 35: | ||
| style="padding: 5px"|Hard |
| style="padding: 5px"|Hard |
||
|- |
|- |
||
| − | | style="padding: 5px"|[[File: |
+ | | style="padding: 5px"|[[File:VersusEnviroshment2.png|150px|link=Vs. Environment]] |
|- |
|- |
||
| style="padding: 5px"|Vs. Environment |
| style="padding: 5px"|Vs. Environment |
||
| Line 51: | Line 52: | ||
| style="padding: 5px"|[[File:FreeForAll.png|150px|link=Free For All]] |
| style="padding: 5px"|[[File:FreeForAll.png|150px|link=Free For All]] |
||
| style="padding: 5px"|[[File:FreeBrawlVersus.png|150px|link=Free Brawl]] |
| style="padding: 5px"|[[File:FreeBrawlVersus.png|150px|link=Free Brawl]] |
||
| − | | style="padding: 5px"|[[File: |
+ | | style="padding: 5px"|[[File:Snowball Versus.png|150px|link=Snowball Fight]] |
|- |
|- |
||
| style="padding: 5px"|Party Deathmatch |
| style="padding: 5px"|Party Deathmatch |
||
| Line 59: | Line 60: | ||
|- |
|- |
||
| style="padding: 5px"|[[File:MeleeSmashVersus.png|150px|link=Melee Smash]] |
| style="padding: 5px"|[[File:MeleeSmashVersus.png|150px|link=Melee Smash]] |
||
| − | | style="padding: 5px"|[[File: |
+ | | style="padding: 5px"|[[File:GunGameVersus.png|150px|link=Gun Game]] |
| style="padding: 5px"|[[File:UndeadBattleground.png|150px|link=Undead Battleground]] |
| style="padding: 5px"|[[File:UndeadBattleground.png|150px|link=Undead Battleground]] |
||
| style="padding: 5px"|[[File:VersusBoss.png|150px|link=Boss]] |
| style="padding: 5px"|[[File:VersusBoss.png|150px|link=Boss]] |
||
| Line 68: | Line 69: | ||
| style="padding: 5px"|Boss |
| style="padding: 5px"|Boss |
||
|- |
|- |
||
| − | | style="padding: 5px"|[[File: |
+ | | style="padding: 5px"|[[File:QuestVersus.png|150px|link=Quest]] |
| + | | style="padding: 5px"|[[File:Hot Potato Thang.png|150px|link=Hot Potato]] |
||
|- |
|- |
||
| style="padding: 5px"|Quest |
| style="padding: 5px"|Quest |
||
| + | | style="padding: 5px"|Hot Potato |
||
|} |
|} |
||
---- |
---- |
||
| Line 104: | Line 107: | ||
{| class="hoverimage" align="center" style="text-align:center;" |
{| class="hoverimage" align="center" style="text-align:center;" |
||
| − | | style="padding: 5px"|[[File: |
+ | | style="padding: 5px"|[[File:BootcampVersus2.png|150px|link=Bootcamp]] |
| − | | style="padding: 5px"|[[File: |
+ | | style="padding: 5px"|[[File:MinigameVersus.png|150px|link=Minigame]] |
|- |
|- |
||
| style="padding: 5px"|Bootcamp |
| style="padding: 5px"|Bootcamp |
||
| style="padding: 5px"|Minigame |
| style="padding: 5px"|Minigame |
||
| + | |} |
||
| + | |||
| + | |-| |
||
| + | PlaceRebuilder Exclusive= |
||
| + | |||
| + | These '''Gamemodes''' can only be played if [[User:PlaceRebuilder|PlaceRebuilder]] so chooses. |
||
| + | |||
| + | ---- |
||
| + | |||
| + | {| class="hoverimage" align="center" style="text-align:center;" |
||
| + | | style="padding: 5px"|[[File:Steil-NadeVersus.png|150px|link=Steil-Mate]] |
||
| + | |- |
||
| + | | style="padding: 5px"|Steil-Mate |
||
|} |
|} |
||
| Line 119: | Line 135: | ||
{| class="hoverimage" align="center" style="text-align:center;" |
{| class="hoverimage" align="center" style="text-align:center;" |
||
| − | | style="padding: 5px"|[[File: |
+ | | style="padding: 5px"|[[File:EvacuationVersusAgain.png|150px|link=Evacuation]] |
|- |
|- |
||
| style="padding: 5px"|Evacuation |
| style="padding: 5px"|Evacuation |
||
| Line 131: | Line 147: | ||
{| class="hoverimage" align="center" style="text-align:center;" |
{| class="hoverimage" align="center" style="text-align:center;" |
||
| − | | style="padding: 5px"|[[File: |
+ | | style="padding: 5px"|[[File:ClassicSurvivalVersus.png|150px|link=Original Survival]] |
|- |
|- |
||
| style="padding: 5px"|Original Survival |
| style="padding: 5px"|Original Survival |
||
Revision as of 07:53, 24 December 2019
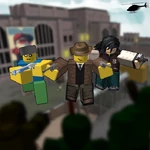
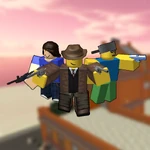
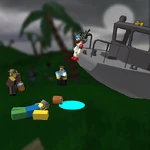
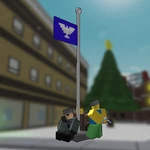
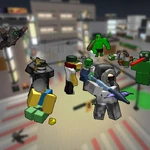
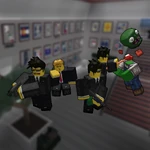
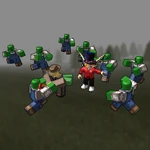
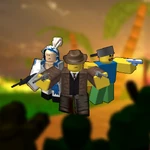
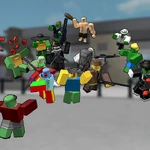
Gamemodes are the core parts of gameplay within R2DA. These dictate specific instructions that the survivors must perform to win rounds, all the while zombies are trying to stop them. Most of these play off the typical "survivor versus zombie" with slight adjustments, but there is some "player versus player" thrown into the mix. You can vote for these by pressing tab in-game, select map, gamemode and some maps even have skybox.
These are Gamemodes that can be picked at any time and are played for two rounds.
After the rounds are up, the game switches to a random Map with an applicable Gamemode unless a pairing has been successfully voted on prior.
|
|
|
|
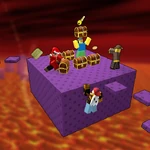
| Rescue | Survival | Campaign | Capture the Base |
|
|
|
|
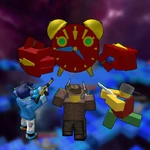
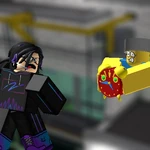
| Arena | The President | Rapid Infection | Hard |
| |||
| Vs. Environment |
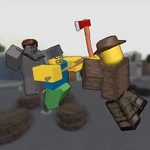
These are Gamemodes that can be picked as long as the one before wasn't exclusive and are played for one round, with the exception of Party Deathmatch, which is played for 2 rounds.
After the rounds are up, the game switches to a random Map with an applicable Gamemode unless a pairing has been successfully voted on prior.
|
|
|
|
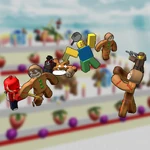
| Party Deathmatch | Free For All | Free Brawl | Snowball Fight |
|
|
|
|
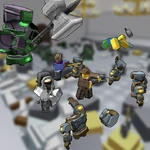
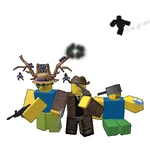
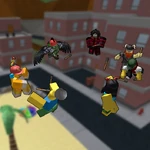
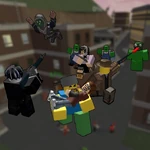
| Melee Smash | Gun Game | Undead Battleground | Boss |
|
| ||
| Quest | Hot Potato |
These are Gamemodes that only appear in a specific Universe.
After the rounds are up, the game switches to a random Map with an applicable Gamemode unless a pairing has been successfully voted on prior.
They can be picked in specific VIP Servers. They will act like any other gamemode.
|

|
| Survival Unlimited | Team Deathmatch |
These are Gamemodes that only appear went an event is taking place in-game and usually last for one round.
After the round is up, the game switches to a random Map with an applicable Gamemode unless a pairing has been successfully voted on prior.
|
|
| Bootcamp | Minigame |
These Gamemodes were around at one point and will be added back once changes are made.
|
| Evacuation |
These Gamemodes were around at one point, and will likely never see the light of day again.
|
| Original Survival |