No edit summary |
No edit summary |
||
| (16 intermediate revisions by 8 users not shown) | |||
| Line 1: | Line 1: | ||
| − | <p style="text-align:center;">'''Armors''' are |
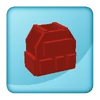
+ | <p style="text-align:center;">'''Armors''' are important gear that can greatly boost survival time. Some '''armors''' have extra stats, helping survivors in other aspects. Some armors may bear a similar name, such as [[Tactical I]] and [[Tactical II]], with '''Tactical II''' being an upgrade over '''Tactical I'''. Though pricey, they can lead you closer to victory if utilised correctly.</p> |
[[File:StoreHeader-1.png|center]] |
[[File:StoreHeader-1.png|center]] |
||
| − | {| |
+ | {|style="width:100px; text-align:center; margin:0 auto" |
| − | | |
+ | |style="padding: 5px;"|[[File:ButtonLifevest.png|link=Lifevest|100x100px]] |
| − | | |
+ | |style="padding: 5px;"|[[File:ButtonTactical1.png|link=Tactical I|100x100px]] |
| − | | |
+ | |style="padding: 5px;"|[[File:ButtonTactical2.png|link=Tactical II|100x100px]] |
| − | | |
+ | |style="padding: 5px;"|[[File:ButtonBulldozer1.png|link=Bulldozer I|100x100px]] |
| − | | |
+ | |style="padding: 5px;"|[[File:ButtonBulldozer2.png|link=Bulldozer II|100x100px]] |
| − | | |
+ | |style="padding: 5px;"|[[File:ButtonBandolier.png|link=Bandolier|100x100px]] |
|- |
|- |
||
| − | | |
+ | |style="padding: 5px;"|[[File:ButtonFirevest.png|link=Firevest|100x100px]] |
| − | | |
+ | |style="padding: 5px;"|[[File:ButtonFaradayVest.png|link=Faraday Vest|100x100px]] |
| − | | |
+ | |style="padding: 5px;"|[[File:ButtonFlakvest.png|link=Flakvest|100x100px]] |
| − | | |
+ | |style="padding: 5px;"|[[File:ButtonScoutvest.png|link=Scout|100x100px]] |
| − | | |
+ | |style="padding: 5px;"|[[File:BeekeeperSuit (2).png|link=Beekeeper Suit|100x100px]] |
|} |
|} |
||
[[File:EventHeader-1.png|center]] |
[[File:EventHeader-1.png|center]] |
||
| − | {| |
+ | {|style="width:100px; text-align:center; margin:0 auto" |
| − | | |
+ | |style="padding: 5px;"|[[File:ButtonCrabvest.png|link=Crab Armor|100x100px]] |
| − | | |
+ | |style="padding: 5px;"|[[File:ButtonBoopack.png|link=Boopack|100x100px]] |
| − | | |
+ | |style="padding: 5px;"|[[File:ButtonGingerbread.png|link=Gingerbread (Armor)|100x100px]] |
| − | | |
+ | |style="padding: 5px;"|[[File:PenguinArmor2button.png|link=Penguin|100x100px]] |
| − | | |
+ | |style="padding: 5px;"|[[File:ButtonYetiHelmet.png|link=Yeti Helmet|100x100px]] |
| − | | |
+ | |style="padding: 5px;"|[[File:ButtonXMasCape.png|link=X-Mas Cape|100x100px]] |
|- |
|- |
||
| − | | |
+ | |style="padding: 5px;"|[[File:CakepackButton.png|link=Cakepack|100x100px]] |
| − | | |
+ | |style="padding: 5px;"|[[File:ButtonPenguinSwimring.png|link=Penguin Swimring|100x100px]] |
| − | | |
+ | |style="padding: 5px;"|[[File:ButtonFrozenXMasCape.png|link=Frozen X-Mas Cape|100x100px]] |
| − | | |
+ | |style="padding: 5px;"|[[File:ButtonFarmersJacket.png|150px|link=Farmer's Jacket|100x100px]] |
| − | | |
+ | |style="padding: 5px;"|[[File:ButtonMagnet.png|150px|link=Magnet|100x100px]] |
| − | | |
+ | |style="padding: 5px;"|[[File:ButtonFroggo.png|link=Froggo|100x100px]] |
|- |
|- |
||
| − | | |
+ | |style="padding: 5px;"|[[File:ButtonPumpkinVest.png|link=Pumpkin Vest|100x100px]] |
| − | | |
+ | |style="padding: 5px;"|[[File:ButtonChristmasBeanie.png|link=Christmas Beanie|100px]] |
| + | |style="padding: 5px;"|[[File:ButtonChristmasCoat.png|link=Christmas Coat|100px]] |
||
|} |
|} |
||
[[Category:Browse]] |
[[Category:Browse]] |
||
Revision as of 08:13, 3 April 2020
Armors are important gear that can greatly boost survival time. Some armors have extra stats, helping survivors in other aspects. Some armors may bear a similar name, such as Tactical I and Tactical II, with Tactical II being an upgrade over Tactical I. Though pricey, they can lead you closer to victory if utilised correctly.
|
|
|
|
|
|
|
|
|
|
|
|

|
|
|
|
|
|
|
|
|

|
|
|
|
|